
Advanced Airdrop Strategy: Looting, Trapping & Survival (2026)
The Airdrop is the most dangerous object in Free Fire. It is a beacon of greed. When players see that yellow beam of light, they lose their minds. They run across open fields, ignoring cover, just to get a Groza or a Level 4 Vest.
And that is why 50% of players die near an Airdrop. They treat it as a gift, when in reality, it is a trap. If you want to reach Grandmaster, you need to change your relationship with the Airdrop. You shouldn’t be the one rushing to loot it; you should be the one shooting the guy who rushes it.
In this advanced guide, we will break down the mechanics of the Airdrop, the “Light Signal” system, and the safest ways to secure high-tier loot without becoming a highlight reel for a sniper.
1. The Mechanics: Lights & Timing
Not all Airdrops are the same. You need to read the signals before you approach.
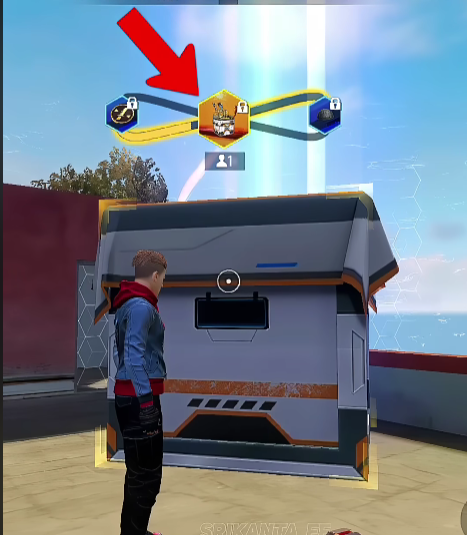
The Light Beam System
- Yellow Beam: The Airdrop has just landed or is still falling. It is full of loot. This attracts the most attention.
- No Beam / Fading Light: The Airdrop has been looted (or mostly looted).
- Blue Beam (War Chests/Defense Airdrop): These are special drops that require you to stand near them to unlock. These are death traps because they force you to stand still in the open for 10-15 seconds. Never attempt a Defense Airdrop without a vehicle or 3 Gloo Walls.
The Spawn Timing
Airdrops usually spawn at the edge of the safe zone or slightly inside the next safe zone. If you see a plane flying overhead, look at the map. If the plane drops a crate outside the safe zone, ignore it. The zone damage isn’t worth a Groza. If it drops inside the safe zone, mark it, but do not rush it yet.
2. The “Gloo Wall Box” Technique (Safe Looting)
If you decide to loot an Airdrop, you must assume a sniper is watching you. You cannot just stand there and open the menu.
The Wrong Way: Running up to the box, standing still, and scrolling through the loot.
The Pro Way (The “L” Shape Wall):
- Run towards the Airdrop.
- Before you touch it, place a Gloo Wall facing the most dangerous direction (usually the high ground or nearest house).
- Place a second Gloo Wall at a 90-degree angle to the first one. This creates an “L” shape or a corner.
- Crouch inside this corner.
- Loot fast.
This protects you from two angles. Yes, it costs 2 Gloo Walls. But is your life worth less than 2 walls? If you don’t have walls, drive a car into the Airdrop and use the car as cover.
3. The Airdrop as Bait (The Camper’s Dream)
Why loot the Airdrop when you can kill the guy who loots it and take his loot plus the Airdrop loot?
The Strategy:
- Spot an Airdrop landing in an open field.
- Do NOT go to it.
- Find a tree, rock, or house about 50-70 meters away. Ensure you have a clear line of sight to the box.
- Wait. Be patient.
- Eventually, a car will drive up, or a player will run to it.
- Wait for them to stop moving to open the loot menu.
- Headshot.
This is the easiest kill in the game. The enemy is stationary, distracted, and thinks they are about to get a reward. Instead, they get sent back to the lobby.
4. Weapon Priority: What to Take?
Airdrops contain specific “crate-only” weapons. Which one is worth dropping your SCAR/MP40 for?
Tier 1: Always Take
- Groza: The best AR in the game. High damage, high stability, high range. Swap any AR for this immediately.
- AWM: If you are a sniper, this is the holy grail. The 150 body damage is game-changing.
- M79 (Launcher): If you find this, you win the game. The grenade launcher destroys squads hiding behind Gloo Walls. It is the most unfair weapon in Free Fire. Take it.
Tier 2: Situational
- M249 (LMG): Good for destroying vehicles and Gloo Walls, but heavy and slow. Take it only if you are the “Support/Spammer” of your squad.
- SVD: Great marksman rifle, but the AC80 or Woodpecker (found on the ground) are arguably better or equal. Don’t risk your life just for an SVD.

5. The “Double Airdrop” Summoner
If you have the “Summon Airdrop” loadout, you can create your own cover.
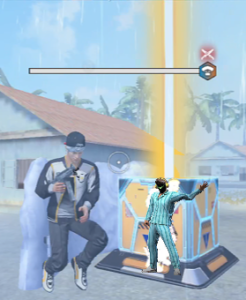
End Game Strategy: In the final circle, there is often no cover (just open grass). If you throw your Summon Airdrop flare, the crate will land in about 1-2 minutes. This crate is indestructible.
You can use your personal Airdrop as a permanent metal shield in the final zone. While enemies are hiding behind breakable Gloo Walls, you have a solid block of steel. Crouch behind it and win the game.
6. Avoiding the “Land Mine” Trap
This is a classic troll move. Smart players will loot an Airdrop, leave one useless item inside (like a pistol ammo), and place a Land Mine hidden under the loot icon.
When you run up to the box, the loot icon pops up, hiding the mine visually. You step close to check the loot, and BOOM.
The Fix: Always shoot the ground near the Airdrop before walking up to it. Or, use your scope to check for the blinking green light of a mine. Never run blindly into a looted Airdrop.
Conclusion
The Airdrop is a tool, not a gift. Use it to bait enemies. Use it as cover. Only loot it if you are desperate or have full control of the area. Remember: A Level 3 Vest inside a crate is useless if you are dead beside the crate.
Frequently Asked Questions (FAQ)
Q: Can the M82B shoot through the Airdrop box?
A: No. The Airdrop crate is solid metal. The M82B penetrates Gloo Walls, not Airdrops. You are 100% safe behind it.
Q: Does the Monster Truck spawn in Airdrops?
A: Yes, the Monster Truck is an Airdrop-exclusive vehicle. It is great for end-game cover but very large and easy to hit.