Kalahari Map Mastery: Refinery, Hookshot & High Ground Guide (2026)
Bermuda is for beginners. Purgatory is for campers. But Kalahari? Kalahari is for rushers. It is the smallest map in Free Fire, meaning the action starts instantly and never stops. The terrain is yellow, the mountains are high, and the danger is everywhere.
Many players hate Kalahari because they die from “unknown angles.” They get sniped from a mountain they couldn’t even see. This isn’t bad luck; it’s bad map knowledge. Kalahari is a 3D map. If you are only looking left and right, you will die. You need to look UP.
In this ultimate guide, we will dissect the desert. We will cover the “Refinery” death trap, the secret “Hookshot” paths, and how to rotate without getting caught in the open sand.
1. Refinery: The Heart of Chaos
Refinery is the “Clock Tower” of Kalahari. It sits smack in the middle of the map on a massive elevated plateau. 90% of matches will have at least one zone closing here.
The High Ground Rule
Refinery is split into multiple levels. The ground floor, the platforms, and the towers. The rule is simple: Whoever holds the highest tower wins.
If you are on the ground looting, you are visible to everyone above you. Never stay on the ground floor for more than 30 seconds. Loot a gun and go up immediately using the ziplines or stairs.
The “Jump” Shortcuts
Most players use the stairs. Smart players use the tires and crates.
- The Window Flank: On the second floor of the main building, you can jump out the window onto the yellow pipes. From the pipes, you can walk around the entire building and shoot enemies in the back who are camping the stairs.
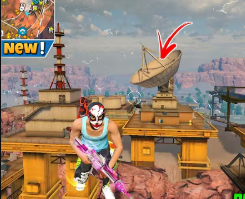
- The Tower Camp: There is a small metal tower at the very top. It is the highest point in the game. If you have an AWM and a Silencer, you can control the entire map from here. But beware: once you shoot, the whole lobby will look at you.

2. The “Hookshot” (Grappling Hook) Guide
Kalahari has an exclusive weapon: The Grappling Hook Gun. You cannot find this on Bermuda or Purgatory. It replaces your pistol.
Why is it S-Tier?
The Hookshot allows you to teleport. You aim it at a ledge, fire, and your character flies to that spot. This breaks the rules of the game.
Top Hookshot Strategies:
- The Unreachable Sniper: Use the hook to get on top of the tall rock formations in “The Maze” or “Santa Catarina.” No one can walk up there. Enemies won’t even look there because they think it’s impossible to reach. You are invisible.
- The Escape Artist: If a squad rushes you in a house, jump out the window and hookshot to the roof of the neighboring house. They will be confused looking for you on the ground while you heal on the roof.
- Flanking: In “Command Post,” use the hook to fly over the walls and land behind the enemy squad.
Warning: While flying, you cannot shoot. You are vulnerable. Don’t hookshot directly at an enemy.
3. Command Post: The Tactical Maze
Command Post is a series of tents, containers, and corridors. It is a Close Quarters Combat (CQC) nightmare.
Weapon Choice: Do not bring a Sniper here. Bring an M1887 or MP40. The fights are face-to-face.
The “Roof” Play: You can climb onto the long tents. Walking on the tent roofs gives you vision inside the compound while keeping you safe from shotgun rushers on the ground. However, watch out for snipers from Refinery looking down at you.
4. Bayfront: The Safe Rotation
If you want to push rank safely, land at Bayfront. It is located at the top (North) of the map.
- Loot: High tier. Plenty of buildings.
- Safety: Few squads land here because it’s far from the center.
- Rotation: From Bayfront, you can rotate South into the “Council Hall” or East to “Refinery.” You have options. It is the “Cape Town” of Kalahari.

5. Sniping on Kalahari (M82B supremacy)
Kalahari is the best map for snipers, specifically the M82B (Barret).
Why? Because cover in Kalahari is often “soft.” Players hide behind wooden crates, tent fabric, or thin metal sheets. The M82B penetrates Gloo Walls and deals extra damage to vehicles.
Best Sniping Spots:
- The Submarine (Santa Catarina): Stand on top of the wrecked submarine. You can see almost the entire lower valley.
- The Skeleton (Mammoth): The giant ribs offer great cover. You can peek through the bones, take a shot, and hide.
6. Rotation Paths: Avoiding the Sand
The biggest mistake players make on Kalahari is running through the open sand dunes. The sand is bright yellow. Your character is dark. You stick out like a target.
The “Ridge” Rule: Never run in the valley. Always run along the ridge (the spine) of the mountains. If you are on high ground, you can look down and shoot. If you are in the valley, you have to look up, which is awkward for aiming.
Vehicle Meta: The Motorbike is great on Kalahari because it can climb steep hills. The Sports Car is terrible because it gets stuck on rocks. Use the bike.
7. Character Loadout for Kalahari
Since the map is small and vertical, you need specific skills.
- Wukong: Essential. There is no grass on Kalahari to hide in. Wukong lets you become a bush anywhere, which is confusing against the yellow sand background.
- Moco: Enemies constantly hide behind rocks. Tagging them ensures you don’t lose them in the complex terrain.
- Misha: If you plan to rotate using the Motorbike, Misha is mandatory to avoid being auto-aimed.
Conclusion
Kalahari is fast. A match here ends in 12-15 minutes compared to Bermuda’s 18-20 minutes. It is efficient for rank pushing if you can survive the early game. Master the Refinery, learn to use the Hookshot, and always, always stay on the high ground. The floor is lava.
Frequently Asked Questions (FAQ)
Q: Where do I find the Hookshot?
A: It spawns randomly as loot on the ground, often in blue zones or high-tier loot areas like Refinery and Command Post.
Q: Is the Ghillie Bush useful on Kalahari?
A: Yes, but only the “Yellow/Dry” Ghillie Bush. The Green one makes you extremely visible against the sand. Be careful which one you pick up.
