Bermuda is the heart and soul of Free Fire. It was the first map, and for many players, it is the only map that matters. But when Garena released Bermuda Remastered, they completely changed the geometry of the island. They didn’t just add better textures; they rebuilt Peak, introduced Samurai Garden, and added Nurek Dam.
Playing Bermuda Remastered like you played the classic 2018 map is a guaranteed way to lose your rank points. The old hiding spots are gone. The old rotation paths are now sniper funnels. If you want to push Grandmaster, you need to understand this map on a microscopic level.
This is not a generic “land far away to survive” guide. This is a 2000-word esports-level masterclass. We will break down the exact math of parachuting, dissect the major Hot Drops (Peak, Clock Tower, Factory), map out the “Death Valleys” you must avoid, and teach you how to rotate like a professional tournament team.
1. The Physics of the Drop (The “Falco” Math)
In Free Fire, the game starts the moment you are in the plane, not when your feet touch the ground. If you land two seconds later than your enemy, they get the M1887, and you get sent back to the lobby.
The 400-Meter Rule
You should never jump when you are directly above your target. You must jump early.
- Without Falco Pet: Jump when you are roughly 400 to 450 meters away from your marker.
- With Falco Pet (Max Level): Jump when you are 550 to 600 meters away.
The Joystick Drag Technique
To achieve maximum speed, you do not just point the camera down. You must pull your left movement joystick at a 45-degree angle (diagonal up-left or up-right) while pointing the camera straight down at your marker. This triggers the fastest diving animation in the game engine. Your speedometer on the right side of the screen should hit 234 km/h. If it is sitting at 180 km/h, you are doing it wrong, and you will be beaten to the ground.
2. Dissecting the Hot Drops (High Risk Zones)
If you are playing for K/D ratio or just want pure chaos, you land here. But you cannot land blindly. You must aim for specific pixels.
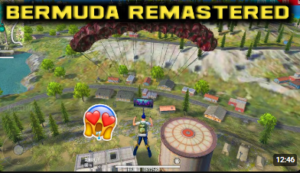
A. Peak (The New Mansion)
The Remastered Peak is entirely different from the old broken houses. It is now a massive, multi-level estate with a central courtyard and surrounding gardens.
The Mistake: Landing directly in the center courtyard or the main roof. The center is a crossfire zone. Everyone who lands on the outer edges will immediately look to the center and shoot you.
The Pro Strategy: Land on the outer rim buildings (the small garages or servant quarters). Grab an SMG. Let the 3 or 4 squads in the main mansion fight each other. Once you hear the “Knock” sound effects in the feed, push into the main building from the ground floor stairs. The staircases in Peak are notorious choke points. Cook a grenade (hold it for 2.5 seconds) and bounce it up the stairs before you push. You will wipe entire squads this way.
B. Clock Tower (The Multi-Level Nightmare)
Clock Tower is arguably the most popular drop in the game. It features three distinct elevation levels: the Tower roof, the Black House, and the underground tunnel.
The Black House Dominance: The house with the dark roof next to the tower is the most powerful position. If you secure the top floor of this house, you have a clear line of sight over the entire Clock Tower courtyard. You can shoot players trying to loot the central area.
The Tunnel Flank: If you are losing a fight at Clock Tower, drop down into the lower area near the water and use the underground tunnel. Most average players forget this tunnel exists. You can use it to wrap around and emerge behind the enemy squad near the Bimasakti side.
C. Factory (The Silo Strategy)
Everyone knows the “Factory Roof Fist Fight” meme, but in high-level Ranked, landing on the roof is a waste of time. There is no loot up there, and you take 50 fall damage when you jump down.
The True Factory Drop: Land on the yellow metal stairs inside the factory or the industrial silos outside. The ground floor of Factory is a maze of crates. Shotguns rule this area. If you find an M1014 here, camp the stairwell. Do not fight in the open middle section; you will be shot from the second-floor railings.

3. The “Grandmaster Route” (Cold Drops & Economy)
If you want to actually win the game and secure plus points, avoid the center of the map entirely. You need a “Cold Drop” that guarantees enough loot for 4 players, has a Vending Machine, and provides a safe rotation path.
A. Rim Nam Village (The Water Fortress)
Located on the far bottom-left of the map, Rim Nam is built on water. It is incredibly safe because nobody wants to rotate out of it.
- Loot Density: It has extremely high-tier loot scattered across the wooden huts. You will easily find Level 3 vests and Super Medkits here.
- The Economy Play: Rim Nam almost always spawns a Vending Machine. Spend your first 3 minutes looting FF Coins. Buy your SCAR Upgrade Chips and Gloo Walls here.
- The Escape: When the zone forces you to move, do not walk through the open fields towards Katulistiwa. Use the Launchpads (Jump Pads) located near the edge of Rim Nam to fly directly into the Bimasakti or Peak area safely in the air.
B. Sentosa (The Isolated Island)
Sentosa is a massive island connected by two bridges and a zipline.
- The Bridge Trap: If you loot Sentosa, you must watch the timer. If you leave too late, an enemy squad will set up a “Bridge Camp” on the other side. They will hide behind cars and spray you down as you cross.
- The Zipline Rotation: To avoid bridge campers, take the zipline that connects Sentosa to Cape Town. However, ensure one teammate goes first to check for enemies. If you all jump on the zipline at the same time and someone is waiting at the end, your entire squad gets wiped out in 5 seconds.
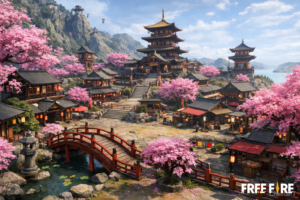
C. Samurai Garden (The Loot Maze)
Exclusive to Remastered, this area replaced the old Bullseye/Graveyard layout on the left side. It is full of cherry blossom trees and traditional Japanese houses.
The houses here have very tight corners and paper walls (which can sometimes be shot through with an M82B). It is excellent for solo players because you can easily lose a pursuing squad by vaulting through the multiple windows and hiding in the dense pink foliage.
4. The Danger Zones: Areas to Avoid at All Costs
In tournament play, there are specific areas of the map called “Death Valleys.” These are geographic low points surrounded by high ground. If you walk through them, you die.
The Bimasakti Strip Valley
The road running through Bimasakti Strip sits at the very bottom of the map. On the right, you have the massive hill of Peak. On the left, you have the hills of Clock Tower. If you run through this valley during Zone 2 or Zone 3, you are exposing yourself to snipers from BOTH high grounds.
How to avoid: If you must cross from top to bottom, rotate along the mountain ridges. Run through the trees on the side of Peak, or wrap around the back of Clock Tower. Never take the main road.
The River of Death (Riverside to Dam)
The water channel running near the Nurek Dam is highly exposed. Swimming is the slowest movement speed in the game, and you cannot shoot back while in the water. If you get caught swimming here by a player on the Dam, there is no Gloo Wall that can save you. Always use the bridges or launchpads to cross.
5. Advanced Tournament Rotations (The “Pinwheel”)
Esports teams do not run in straight lines. They use a technique called the Pinwheel Rotation or “Playing the Edge.”
When the new white circle appears, do not draw a straight line from your location to the center of the circle. That path intersects with every other squad trying to do the exact same thing.
- Hug the Blue: Run parallel to the shrinking blue storm zone. Keep the storm right on your back or your side.
- Clear the Flanks: By keeping the storm on your back, you eliminate 180 degrees of danger. You know mathematically that no one can shoot you from behind because the storm would kill them.
- The Late Entry: Enter the new safe zone at the very last second. You will likely arrive behind a squad that is busy fighting someone else in the center. This allows you to “Third-Party” them, stealing the kills and the loot while taking zero damage yourself.
6. Late Game Positioning (Zone 4 & 5)
When the circle is tiny, the game shifts from “Looting” to “Resource Management.”
The Hard Cover Rule: A Gloo Wall is “Soft Cover.” It breaks. A rock, a thick tree, or a brick wall is “Hard Cover.” It is indestructible. In the final two zones, you must secure Hard Cover. If you rely solely on Gloo Walls, a player with Skyler or an M79 Grenade Launcher will delete your cover and kill you.
High Ground Priority: If the final circle ends on a hill (like the hills outside Factory), you must take the top of the hill immediately. Firing down at an enemy allows you to hit headshots effortlessly due to the angle, while they can only hit your legs or your Gloo Wall.
Conclusion
Bermuda Remastered is a map of geometry and timing. Every rock, every window, and every zipline has been placed there for a reason. The players who are hard-stuck in Diamond are the ones who just react to what happens on their screen. The players who hit Grandmaster are the ones who predict what will happen 3 minutes before it does.
Memorize the drop timings. Avoid the death valleys. Exploit the vending machines at the edges of the map. And above all, never run through the middle of Bimasakti Strip unless you have a death wish. See you on the island.
Frequently Asked Questions (FAQ)
Q: Is there any difference in gun damage between maps?
A: No. Gun stats are identical across Bermuda, Purgatory, Alpine, and Kalahari. However, open maps like Alpine favor snipers, while tight maps like Bermuda favor SMGs.
Q: What is the fastest vehicle for rotations on Bermuda?
A: The Motorcycle is the best for traversing the hilly terrain of Peak and Clock Tower. The Sports Car (Lamborghini) is faster on roads but gets stuck easily on rocks and uneven grass.
Q: Do Vending Machine locations change?
A: Yes and no. There are “Fixed” vending machines that spawn in the same towns every game, and there are “Airdrop” vending machines that fall from the sky randomly in the later zones.
0 Comments